Butterscotch cookies are a delightful twist on the classic cookie, offering a rich and caramel-like flavor that is loved by many. These cookies are a blend of sweet and slightly salty, with a distinct taste reminiscent of butterscotch candies.
The unique taste and enticing aroma of butterscotch cookies make them a favorite among cookie enthusiasts, especially during the fall season. In this culinary journey, we invite you to discover an easy homemade butterscotch recipe that promises simplicity and scrumptiousness in every bite. Additionally, we’ve curated essential butterscotch baking tips for beginners to ensure that even those taking their first steps in the baking realm can create these wonderful cookies effortlessly.
The best season to bake these delectable butterscotch cookies is undoubtedly autumn. As the leaves change colors and a crisp chill fills the air, the flavors of butterscotch perfectly complement the cozy and comforting ambiance of fall. The warm, buttery notes of butterscotch evoke feelings of nostalgia and comfort, making these cookies an ideal treat to enjoy during cool autumn evenings. The seasonal transition perfectly complements the rich, caramel-like essence of butterscotch, making it a quintessential autumn delight.
What makes butterscotch cookies even more enticing is their ease of preparation, making them an excellent choice for beginners in the baking world. The recipe for butterscotch cookies is relatively simple and straightforward, making it accessible for those just starting their baking journey. The ingredients are typically basic pantry staples, and the steps involve standard mixing and baking techniques.
Even if you’re new to baking, following a good butterscotch cookie recipe will allow you to produce a batch of delicious cookies that will impress family and friends alike. So, grab your apron and mixing bowl, and join us as we embrace the simplicity and joy of crafting homemade butterscotch cookies, perfect for novice bakers and seasoned enthusiasts alike.
Best Cookie Recipes
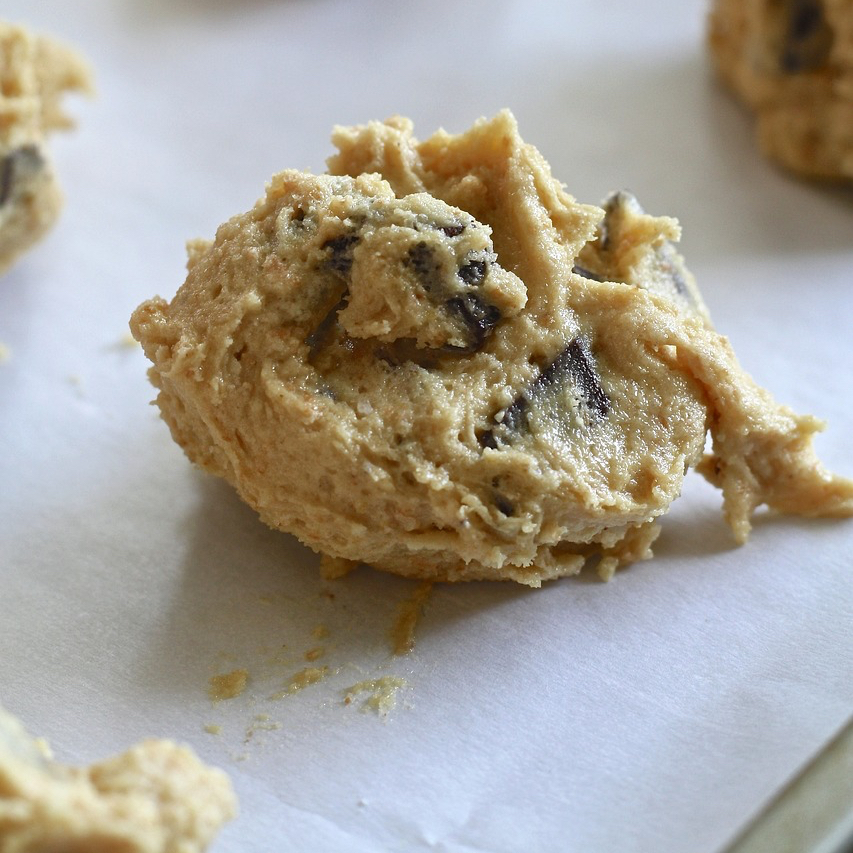
Secret to Making Toll-House Chocolate Chip Cookies
Where Did Butterscotch Cookies Start
The invention of butterscotch cookies, like many classic recipes, does not have a single clear origin or inventor. Butterscotch as a flavor has been around for centuries, and its incorporation into various baked goods, including cookies, has likely evolved over time through culinary experimentation and innovation.
The term “butterscotch” is believed to have originated in Scotland, where “scotch” referred to scorched or cooked sugar. It involves the combination of brown sugar and butter, creating a sweet, caramel-like flavor. As for butterscotch cookies, they likely evolved as a natural extension of using the butterscotch flavor in baking.
Regarding the country where butterscotch cookies are most favored, it’s a popular flavor in both the United States and the United Kingdom. In the U.S., butterscotch-flavored treats, including cookies, are commonly enjoyed and readily available. In the UK, too, butterscotch is a beloved flavor, often used in desserts and confections. Additionally, butterscotch-flavored products and recipes have gained popularity in various other countries as well, as the delightful blend of caramelized sugar and butter is appreciated by many around the world.
Now that you know the how easy it is to prepare butterscotch cookies and its origin. Let’s dive in to learn ten essential butterscotch baking tips for beginners.
10 Essential Butterscotch Baking Tips for Beginners
For beginners venturing into the world of butterscotch baking, here are some essential tips to ensure your butterscotch treats turn out delicious.
Quality Ingredients Matter
Start with high-quality ingredients, especially when it comes to butter and brown sugar. Opt for unsalted, good-quality butter and fresh, soft brown sugar for the best butterscotch flavor.
Proper Butter and Sugar Ratio
Maintain a balanced ratio of butter to brown sugar. This balance is crucial to achieving the signature butterscotch taste and texture.
Don’t Rush the Cooking Process
Take your time while cooking the butter and sugar. Allow them to meld together over low to medium heat, stirring constantly, until the mixture becomes smooth and has a caramel-like color.
Use Low Heat
Avoid high heat, as it can cause the sugar to burn and affect the taste of your butterscotch. Low to medium heat allows for gradual caramelization and better flavor development.
Stir Continuously
Stir the butter and sugar mixture constantly to prevent it from sticking to the pan and to ensure even cooking and caramelization.
Add Cream Cautiously
When adding cream (or any liquid), do so slowly and in a steady stream. The mixture will bubble vigorously, so exercise caution to prevent burns.
Consistency is Key
Achieve the desired consistency by adjusting the amount of cream you add. For a thicker butterscotch, use less cream, and for a thinner consistency, add a bit more.
Cool Before Using
Allow your butterscotch sauce to cool slightly before using it in your recipe. It thickens as it cools and using it at the right temperature will help in achieving the desired texture in your final product.
Incorporate Butterscotch into Batter
Add your butterscotch sauce to your cookie or cake batter gradually, ensuring it’s evenly distributed for a consistent butterscotch flavor in every bite.
Experiment and Enjoy
Don’t be afraid to experiment with the butterscotch flavor—try adding a touch of vanilla or a sprinkle of sea salt to enhance the taste. The beauty of baking is in the creativity, so have fun and enjoy the process!
By following these tips and embracing the wonderful flavors of butterscotch, you’ll be well on your way to creating delicious and satisfying butterscotch treats!
Next, let me tell you how adding chips to a butterscotch cookie recipe adds texture and flavor to this Fall cookie!
You Can Use Butterscotch or Chocolate Chips in Your Butterscotch Cookie Recipe!
Whether butterscotch chips or chocolate chips are better for a butterscotch cookie recipe ultimately depends on personal preference and the flavor profile you’re aiming for in your cookies.
If you want to highlight the distinctive butterscotch flavor and achieve a more caramelized, sweet, and slightly salty taste, using butterscotch chips would be the better choice. Butterscotch chips have a unique, caramel-like taste that complements the cookie dough, giving your cookies that classic butterscotch flavor.
On the other hand, if you’re looking to create a contrasting flavor profile with a hint of bitterness or a deeper chocolatey taste, chocolate chips can be a great addition. The combination of chocolate and butterscotch can offer a delightful contrast in flavors, making the cookies richer and more complex in taste.
For a classic butterscotch cookie, using butterscotch chips is the traditional and preferred choice. However, if you’re feeling adventurous and want to experiment with flavors, you can even use a combination of both butterscotch and chocolate chips to create a unique cookie with the best of both worlds.
Ultimately, the decision comes down to your taste preferences and the flavor you desire for your cookies. Whether you go with butterscotch chips, chocolate chips, or a combination of both, you’re bound to have a delicious batch of cookies to enjoy!
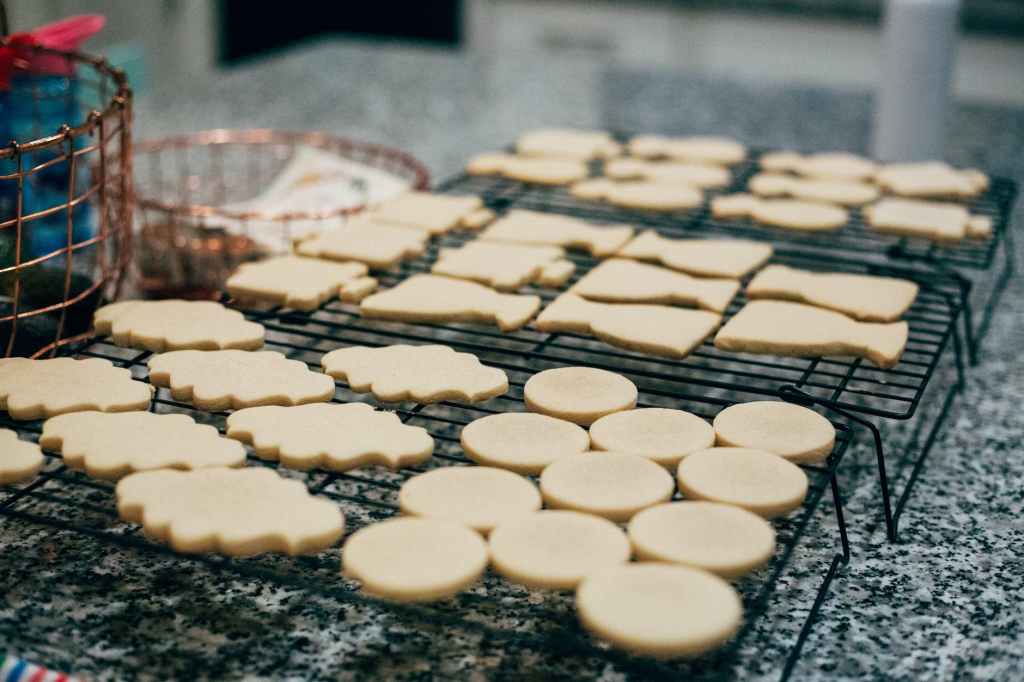
Here’s An Easy Homemade Butterscotch Cookie Recipe
This recipe makes approximately 24 cookies. Feel free to adjust the recipe to your liking and enjoy the delightful butterscotch flavor in these classic cookies!
Ingredients
– 1 cup (227g) unsalted butter, softened
– 1 cup (220g) brown sugar, packed
– 2 large eggs
– 1 teaspoon (5ml) vanilla extract
– 3 cups (384g) all-purpose flour
– 1 teaspoon (5g) baking soda
– 1/2 teaspoon (2.5g) baking powder
– 1/2 teaspoon (3g) salt
– 1 and 1/2 cups (270g) butterscotch chips
Instructions
1. Preheat your oven to 350°F (175°C) and line baking sheets with parchment paper.
2. In a large mixing bowl, cream together the softened butter and brown sugar until smooth and creamy.
3. Beat in the eggs one at a time, then stir in the vanilla extract.
4. In a separate bowl, whisk together the flour, baking soda, baking powder, and salt.
5. Gradually add the dry ingredients to the butter mixture, mixing just until combined. Avoid overmixing.
6. Stir in the butterscotch chips evenly throughout the dough.
7. Drop rounded tablespoons of dough onto the prepared baking sheets, spacing them about 2 inches apart.
8. Bake in the preheated oven for 10-12 minutes or until the edges are lightly golden.
9. Allow the cookies to cool on the baking sheets for a few minutes before transferring them to wire racks to cool completely.
10. Enjoy your homemade butterscotch cookies with a glass of milk or your favorite beverage!
Make sure to store your butterscotch cookies to preserve the freshness, flavor, and texture for long-term.
Learn These 7 Tips for Storing Homemade Butterscotch Cookies!
Cool Completely
Before storing, ensure that the cookies are completely cooled. Warm cookies can create condensation when stored, making them soggy.
Use Airtight Containers
Transfer the cooled cookies to an airtight container. This could be a cookie jar, a resealable plastic container, or a cookie tin. A tight seal will keep the cookies fresh and prevent them from becoming stale.
Layering and Separation
If you need to stack the cookies in the container, place sheets of parchment paper or wax paper between the layers to prevent them from sticking together or getting damaged.
Avoid Moisture
Store the container in a cool, dry place away from direct sunlight and moisture. Excess moisture can make the cookies mushy or cause them to spoil.
Refrigeration (Optional)
While not necessary, you can extend the freshness of your cookies by storing them in the refrigerator. However, allow them to come to room temperature before serving for the best taste and texture.
Freezing (Long-term Storage)
If you want to store the cookies for an extended period, consider freezing them. Place the cookies in a single layer on a baking sheet and freeze until solid. Then transfer them to a freezer-safe container or resealable bag, separating layers with parchment paper. Label the container with the date and type of cookies. Cookies can be stored in the freezer for up to 2-3 months. Thaw at room temperature before consuming.
Avoid Mixing Flavors
When storing different types of cookies, keep them in separate containers to maintain their individual flavors.
By following these storage tips, you’ll be able to enjoy your homemade butterscotch cookies at their best for an extended period.
In Summary,
Making homemade butterscotch cookies is a delightful experience, especially during the Fall season. The process is joyously simple, guided by essential baking tips that ensure a smooth and easy preparation.
The blend of buttery caramel flavors evokes warmth and comfort, perfectly complementing the cozy ambiance of autumn. Crafting these cookies is an effortless venture for both beginners and seasoned bakers, thanks to the straightforward steps and readily available ingredients.
The aroma of butterscotch that fills the kitchen adds to the anticipation and excitement of creating these seasonal treats. The easy-to-follow recipe allows for creativity and personalization, making the baking experience truly enjoyable. The result is a batch of golden, chewy cookies with a rich butterscotch taste, embodying the essence of fall in every bite.
Sharing these homemade cookies with loved ones enhances the joy and sense of togetherness during this festive season. Overall, making butterscotch cookies is a simple and rewarding activity that brings the flavors and joys of autumn into your home.
Happy Baking!
Want to Learn More?
Subscribe for more posts like this
Is there anything else you’d like to know about baking and wish it was included in this article? Let us know by leaving a comment below.
About Gabby…
Gabby is a hobbyist who enjoys baking for family and friends. She created this blog to provide a comprehensive guide to baking for the everyday baker. Follow her on Reddit, Pinterest, Tumblr, Facebook, or become a member of the Blabby Gabby community to get the latest information where she will discuss fundamentals, recipes, historical facts or other content related to baking quick breads, yeast breads and pastries.
Disclosure: Please note that some of the links in the article are affiliate links. Other links are internal links that connect you to in-depth content, within the blog, that relate to the topic of discussion. I’ll earn a commission if you decide to use one of the affiliate links listed in the article for your personal use. My goal is to provide you with quality content and only recommend the products and services I’ve personally used, researched, and stand behind. If you use one of the affiliate links, then the company will compensate me. This compensation helps me run this blog and keep my in-depth content free of charge for readers and/or subscribers.